Photographing White Sands National Park, New Mexico
White Sands National Park (formerly White Sands National Monument) is a 275 square mile, gleaming white gypsum dune field in southern New Mexico. The area is popular with families for its fantastic dune sledding, hiking, and camping.
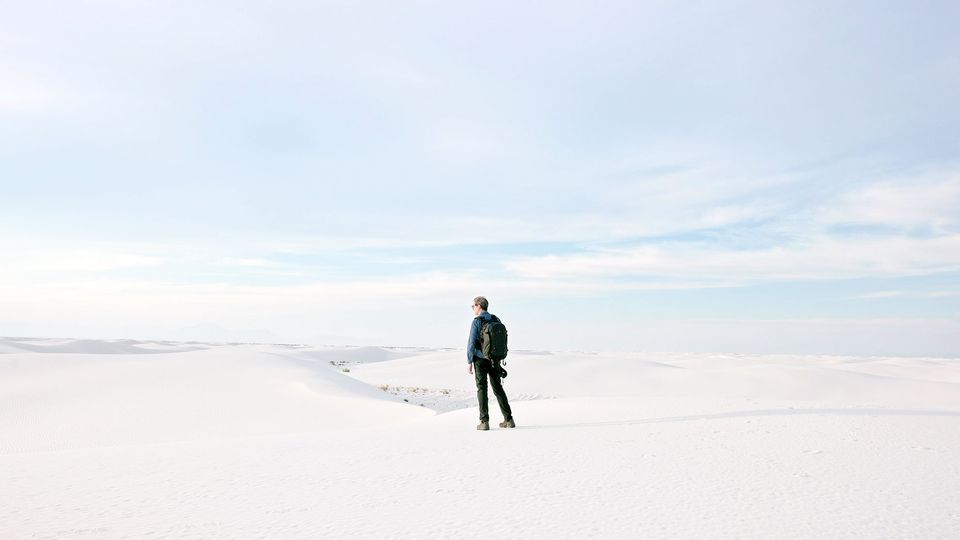
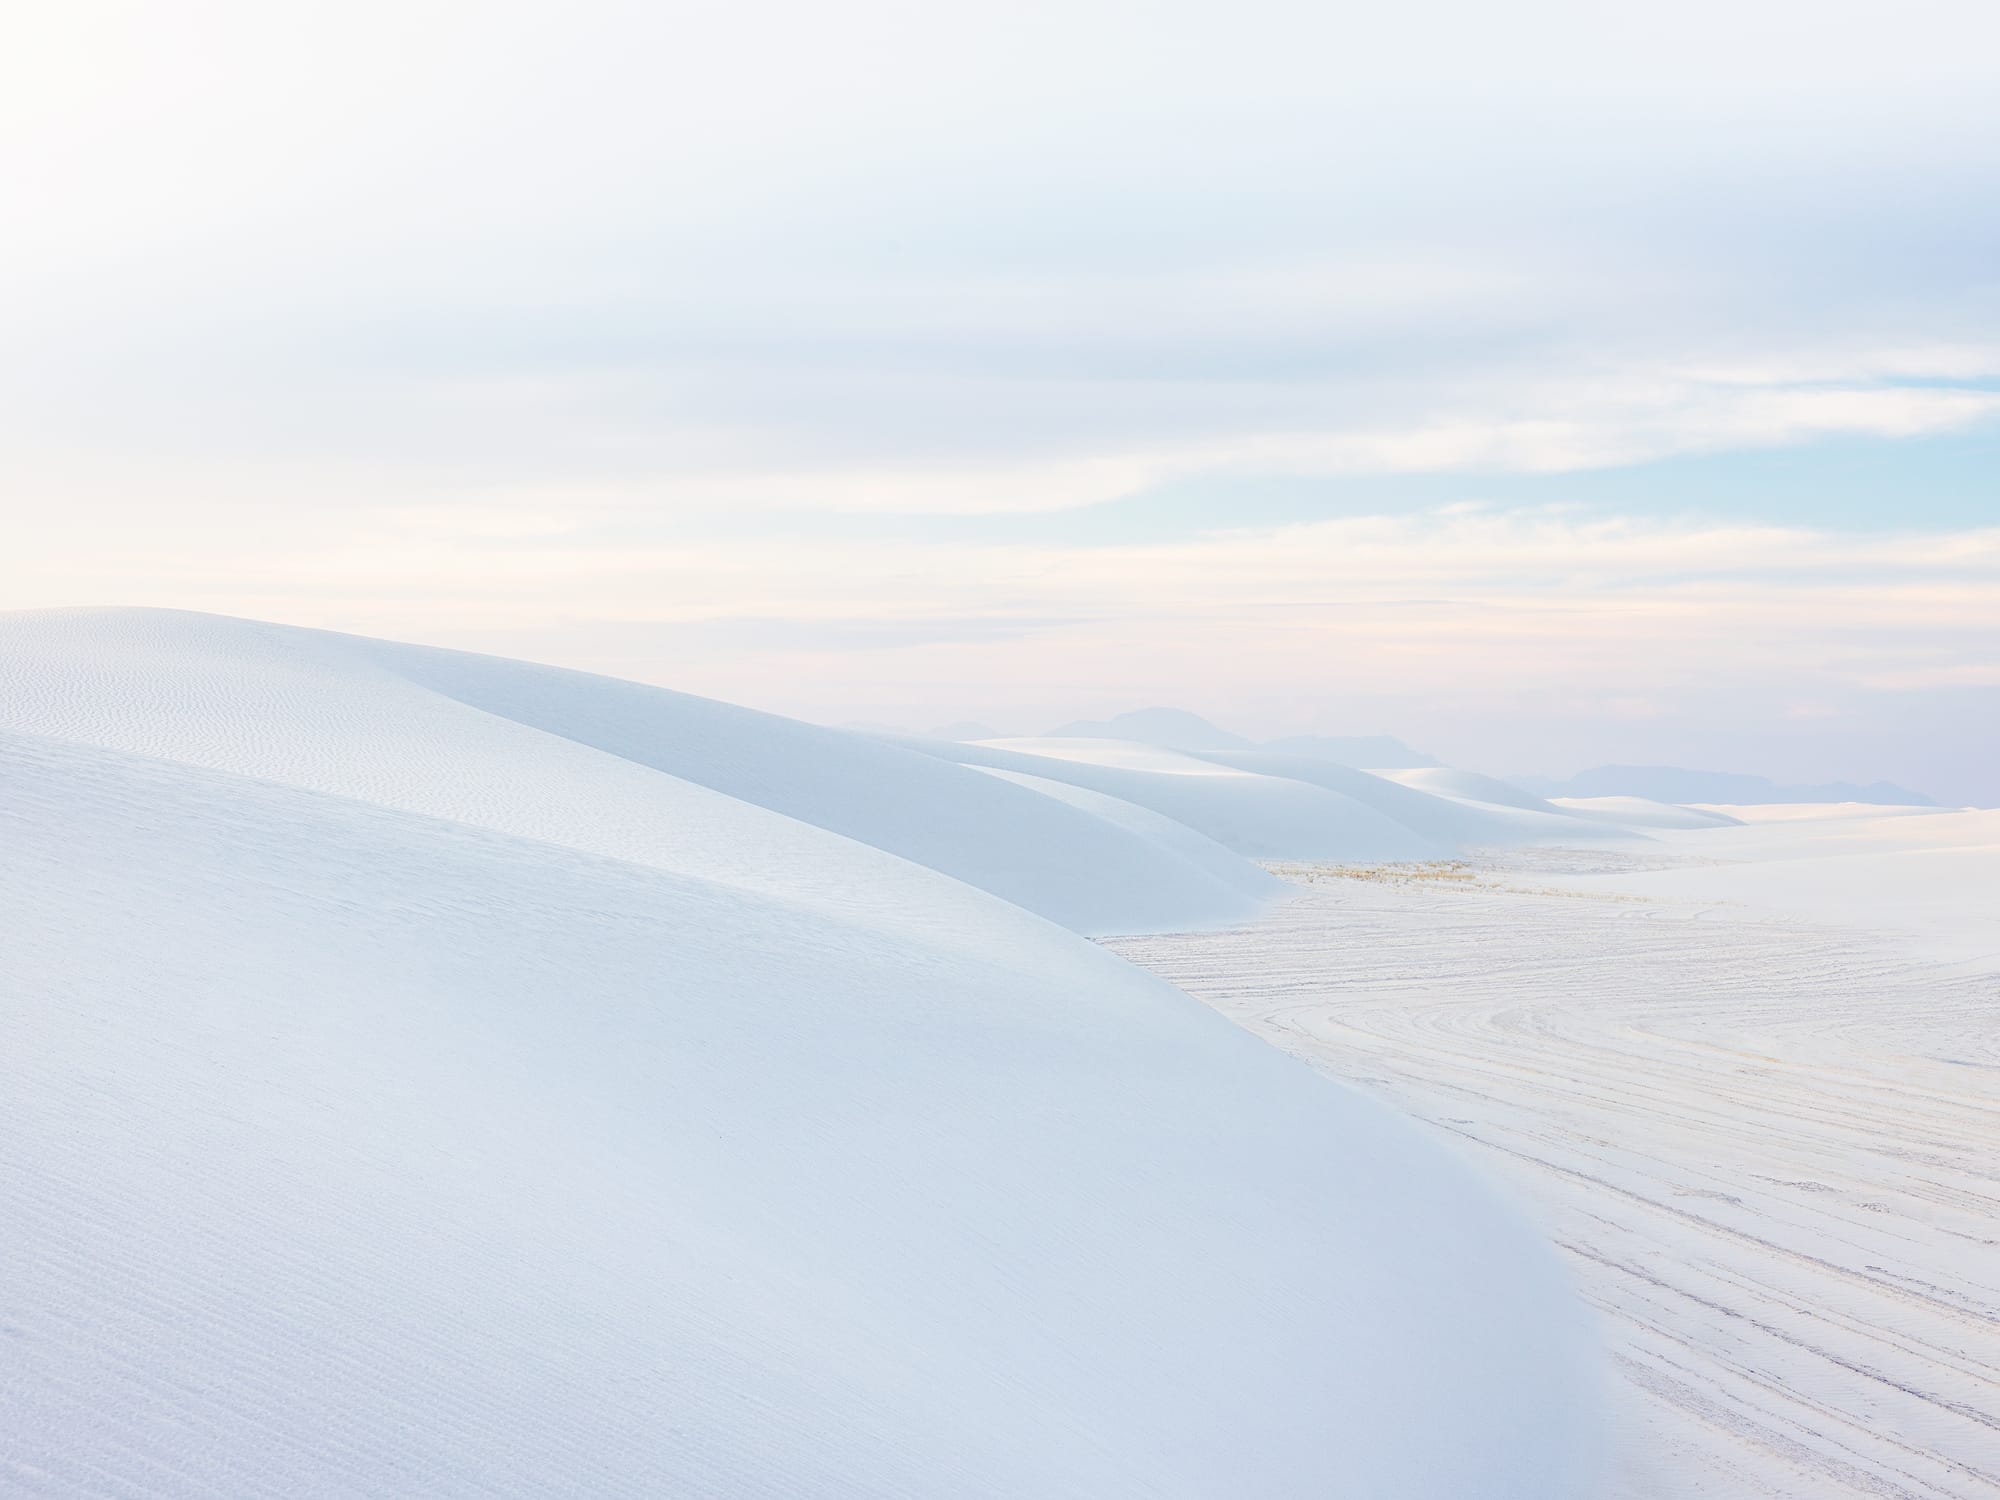
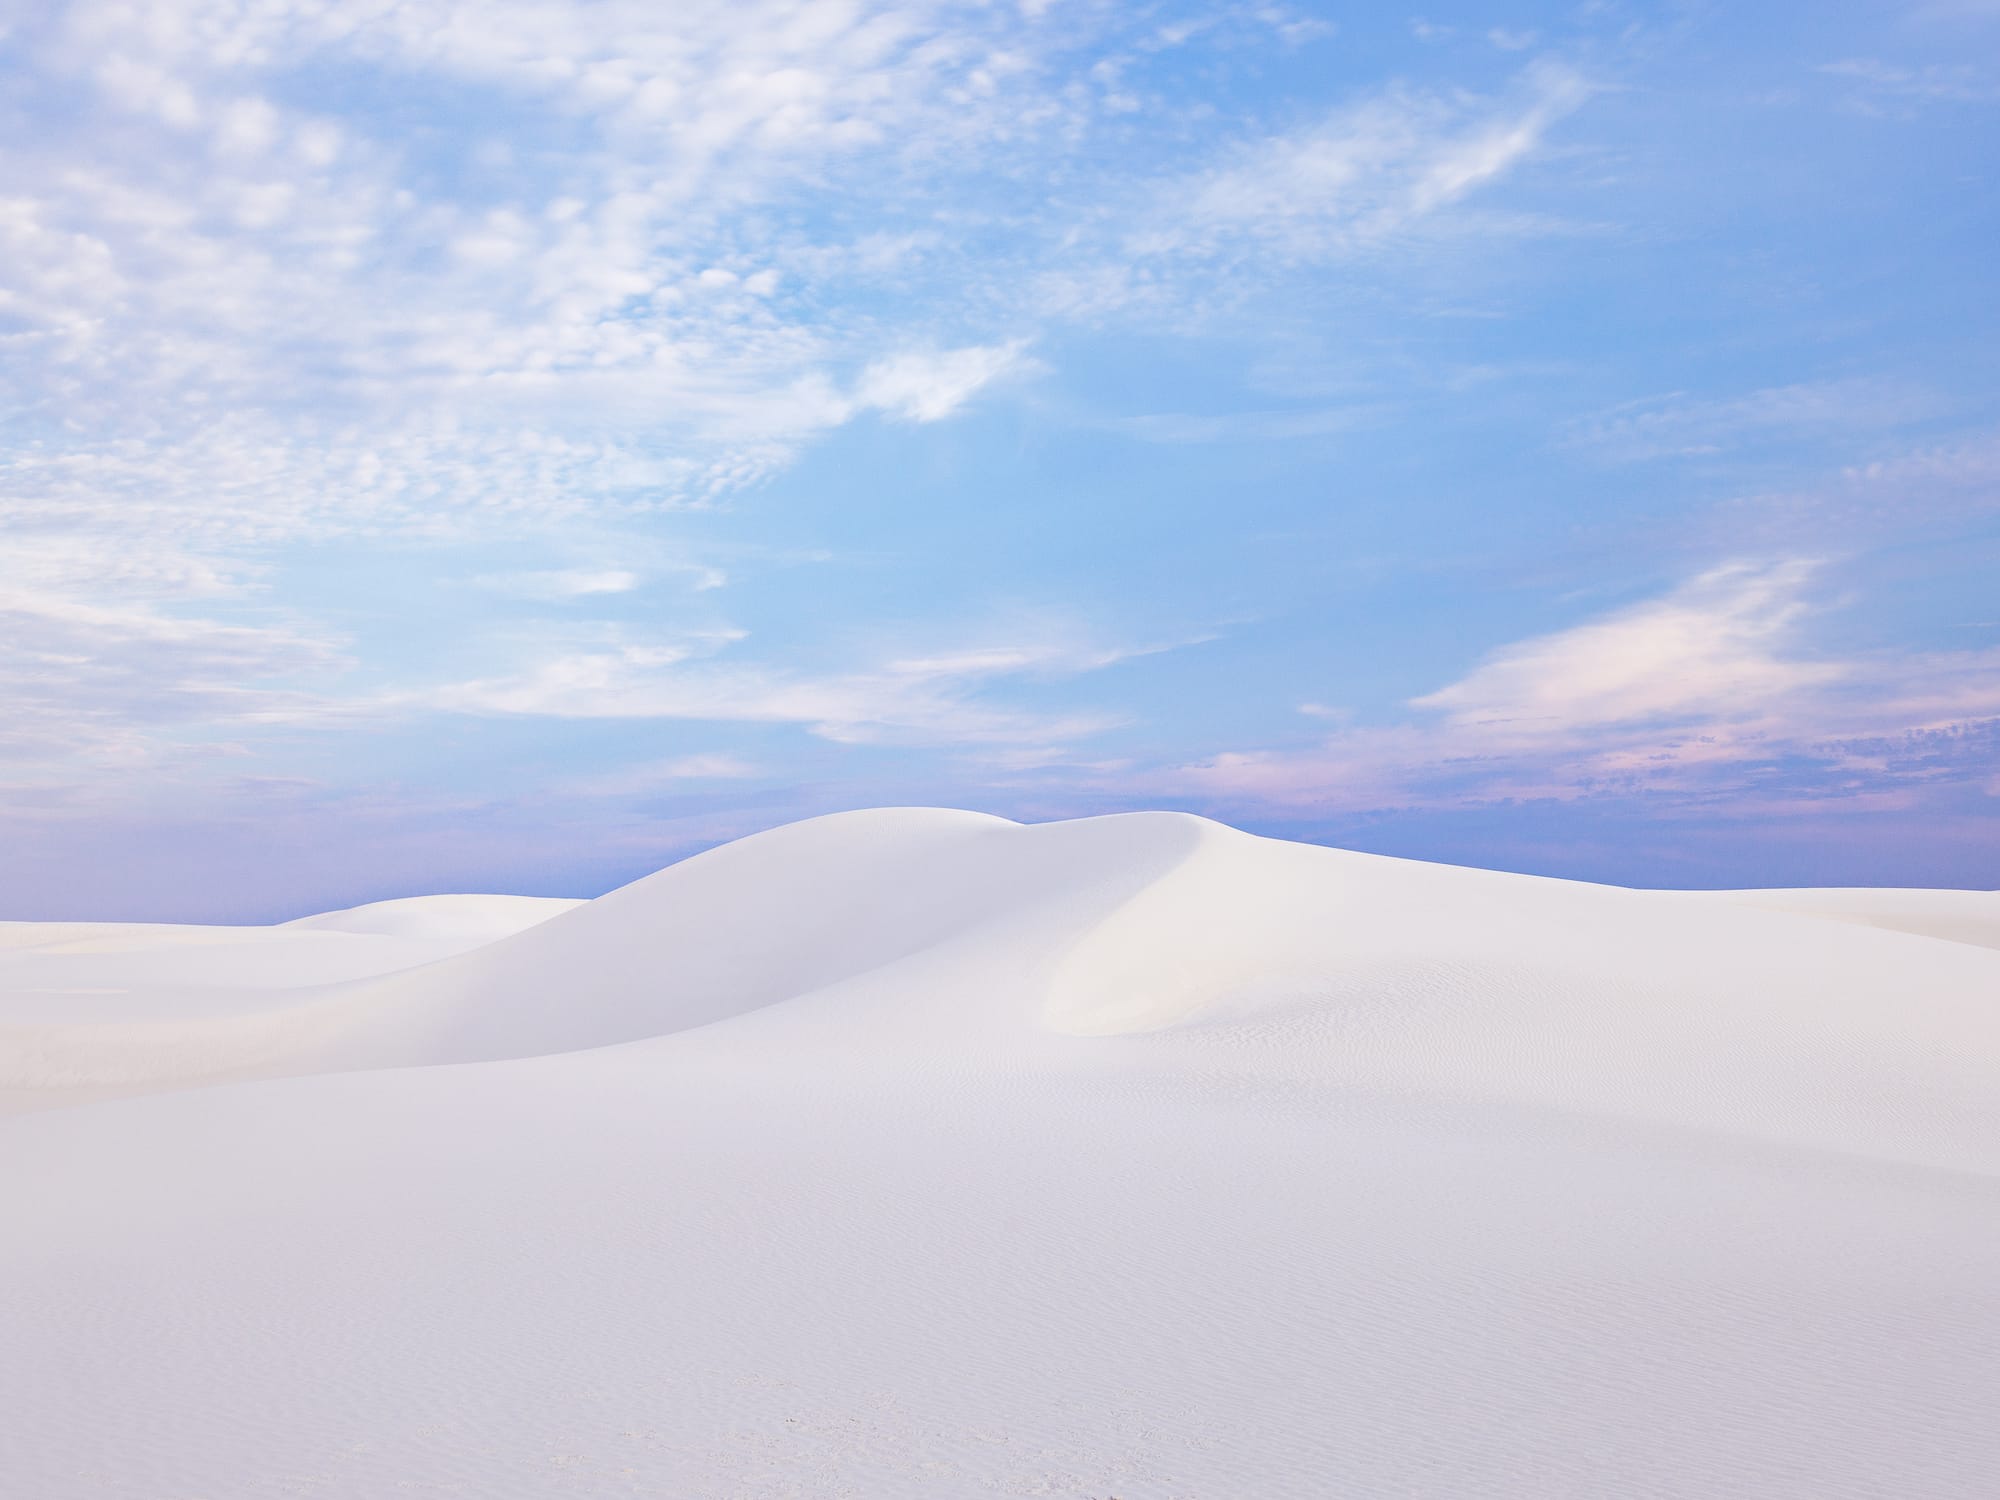
Photographically, White Sands is truly one of the most remarkable landscapes in the American West. Its dunes aren't yellow, orange, or beige like other dune fields, but brilliant white. So bright they look like fresh snow. I've photographed White Sands multiple times, and have learned a lot about the park itself, plus the best times and methods for capturing it.
Getting there
If driving across the American west, White Sands is a fantastic detour — even for just a few hours. If flying, El Paso is an hour-and-a-half drive away (and closer than Albuquerque). There is no public transportation, so you'll need your own vehicle to get there.
Accommodations and camping
White Sands is situated between the towns of Las Cruces to the west and Alamogordo to the east. The latter is a quick fifteen minute drive away. Both towns offer small motels and privately owned Airbnbs.
Airbnbs in Las Cruces, New Mexico
Airbnbs in Alamogordo, New Mexico
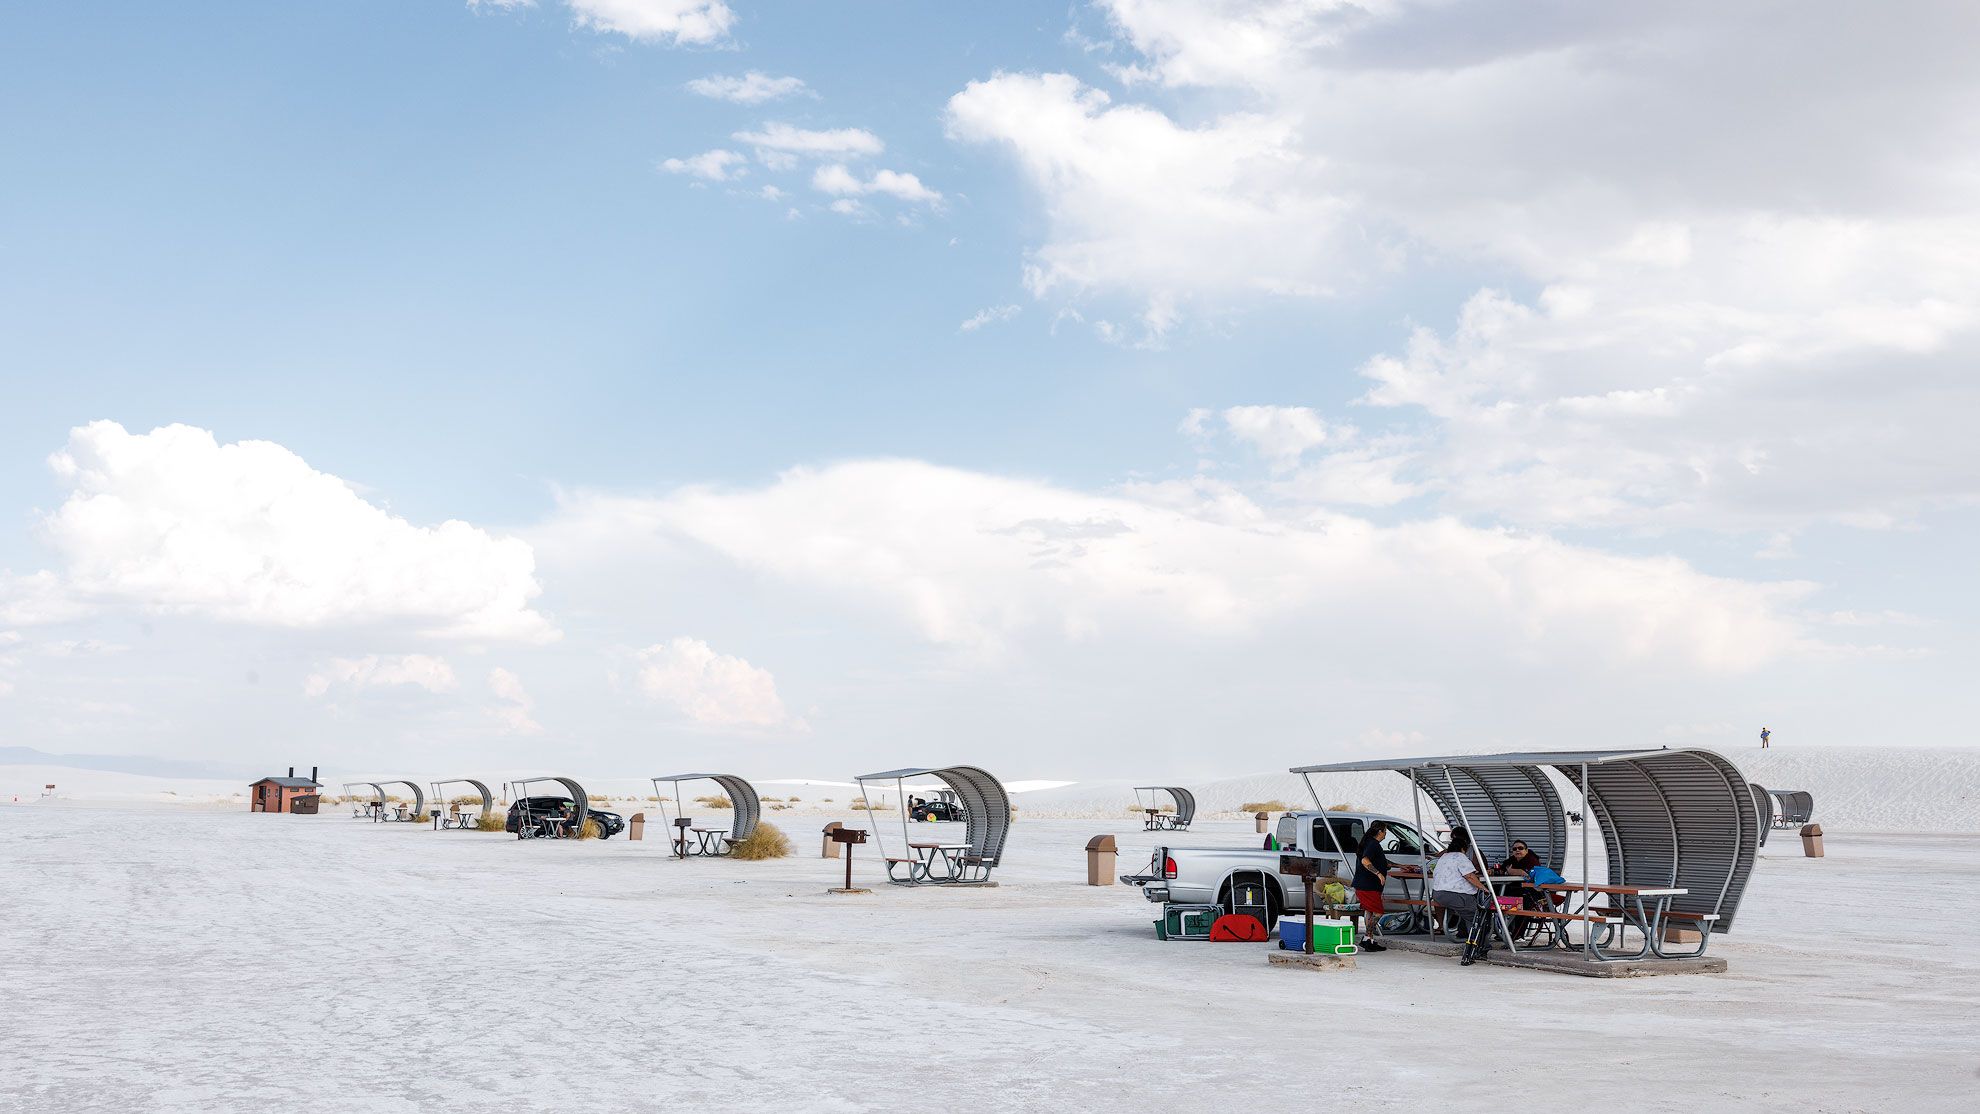
Camping overnight in an RV or camper van inside the park is not allowed. Rangers make the rounds at closing and clear out the parking lots. Backcountry camping in the dunes (with a permit) is not available at the time of this writing, but could be available again by the time you read this. Check the White Sands camping page for the latest permit information and availability.
Opening and closing times
White Sands has firm opening and closing times with a single, gated entrance and exit by the main road. Park rangers open and close the gate at fixed times. Though rare, the park also closes for missile tests from a nearby military base.
Update (2024): Thankfully, White Sands has updated their opening and closing hours to be more inline with seasonal time changes at sunset (beforehand, the park would sometimes begin closing before golden hour). From this point forward, the park now opens daily at 7am and closes an hour after scheduled sunset, whenever sunset occurs for a particular day. This makes planning a date and time to visit much easier, and gives everyone plenty of time to hike back to their vehicles and leave the park. As always, check their official operating hours for more info.

Hiking the dunes
White Sands has two official hiking trails: the Backcountry Trail and the Alkali Flat Trail. The latter is a five mile loop that features the tallest dunes in the park. Both trails are sporadically marked with red metal posts to guide you along. There is no requirement to stay on either trail, or use the trails at all. You're free to hike and wander anywhere you please.
Dunes on these trails, near the road and picnic areas will be heavily trampled with footprints and sled marks. If however you hike a mile or so further into the field, the dunes should be more pristine. The further you go, the better the dunes.

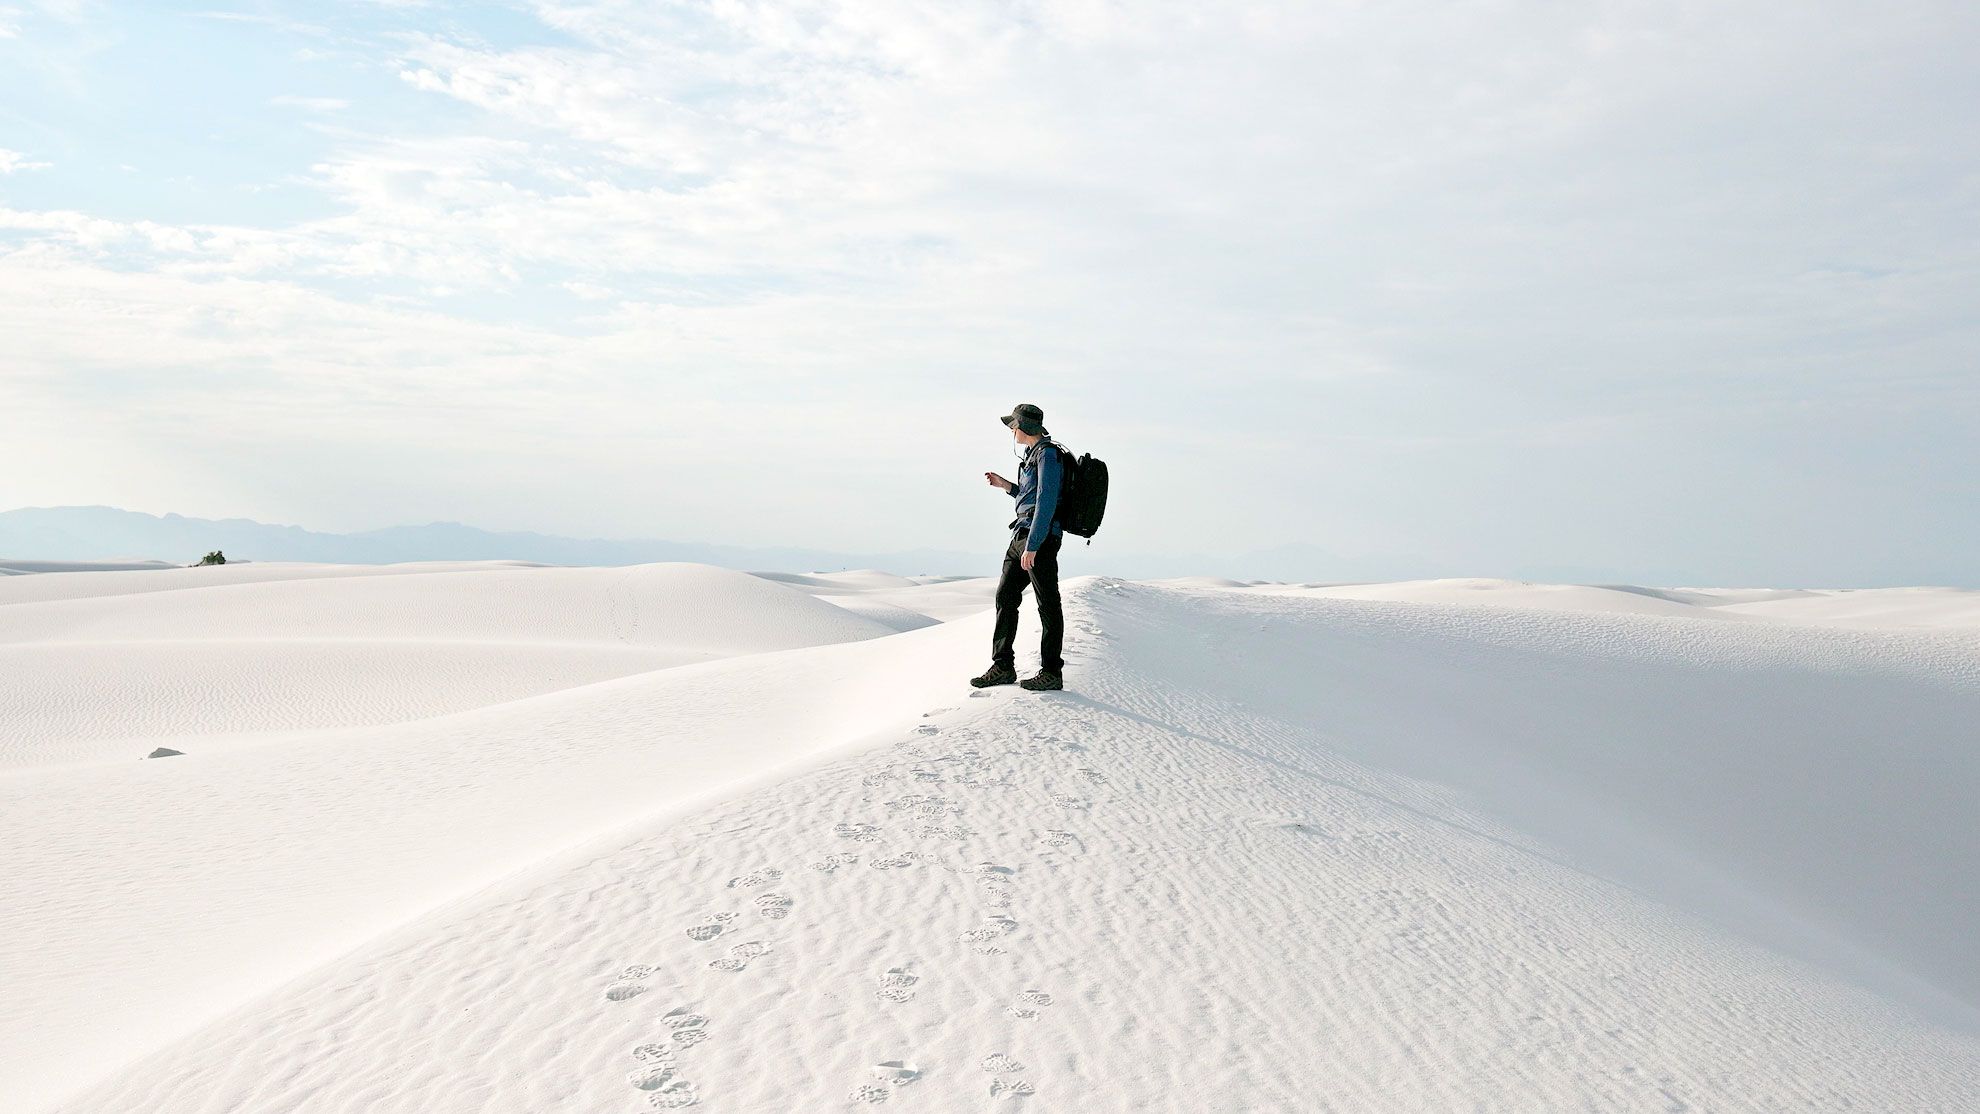
If you do wander off the marked trails, remember that the San Andreas mountains are to the west, and the main road and parking areas are to east. I recommend checking the horizon from time to time to reorient yourself while hiking.
Better yet, bring a phone with GAIA GPS or AllTrails installed to record your hike and track your GPS coordinates. These apps are free, and will record how far you've hiked and how to get back using digital breadcrumbs.
Most importantly, remember that White Sands is a desert. There is no shade, and the sun can be hot and intense when reflecting off the white gypsum. Sand is also more physically demanding to hike through, so consider your physical health and stamina before venturing too far.
I recommend bringing the following:
- Sunscreen
- Sun-hat. The wider the brim, the better. Boonie hats are perfect.
- Sunglasses
- Comfortable hiking shoes
- Trekking poles
- Long-sleeve, lightweight hiking shirt
- More water than you think you'll need
- Snacks to munch on
What to pack in your camera bag
When packing camera gear for White Sands, I would bring a medium telephoto lens (24-70mm or 24-105mm), then a wide-angle variable zoom (eg, 16-35mm). A third telephoto lens (70-200mm) could also be helpful for distant shots to compress the dunes against the San Andreas mountains, or tightly cropped abstract shots, but I'd only bring one if you have space and don't mind carrying extra weight. Also pack and use lens hoods to help mitigate flare and bright reflections (I made this mistake and lived to regret not mounting a hood).
Tripods shouldn't be necessary if shooting during normal daylight hours. The bright white dunes and sky will force your camera to use a high shutter speed, which should negate any camera shake when shooting handheld. A tripod is only necessary if you intend to shoot long exposures or in dim light at golden hour and blue hour.
Speaking of long exposures, consider packing a high density, solid neutral density filter. Six stops or higher will slow the camera shutter and add dramatic blur, motion and energy to the sky.
Also know that when the sun goes down, the dunes get dark. Very dark. If you plan to shoot through blue hour (which you absolutely should do!), bring an LED head lamp to help illuminate your return hike.
Oh, and drones are not permitted anywhere in the park, so don't bother bringing one.
When to photograph the dunes
If the sky is clear, the dunes will be gleaming white from late morning to mid-afternoon. Contrast will be harsh, and the bright light may obscure small details and textures in the dunes. In these conditions I'd recommend exposing for the brightest highlights, then bump your exposure a little brighter by a half-to-full stop, as you would when photographing snow. You can absolutely get great daytime shots, even in full sun (especially if shooting for high contrast black and white).
If conditions are cloudy and overcast, the sky will likely blend into the dunes, with little visual separation between the two. This would be a great time to exclude the sky and focus on subtle details and patterns in the dunes while the light is soft and diffused.
Overall, in my experience, the absolute best time to photograph White Sands begins two hours before sunset. The sun is lower in the sky, just above the San Andreas mountains, which gives the dunes more shape and dimension when looking north and south (they will likely appear flat to the east and west).
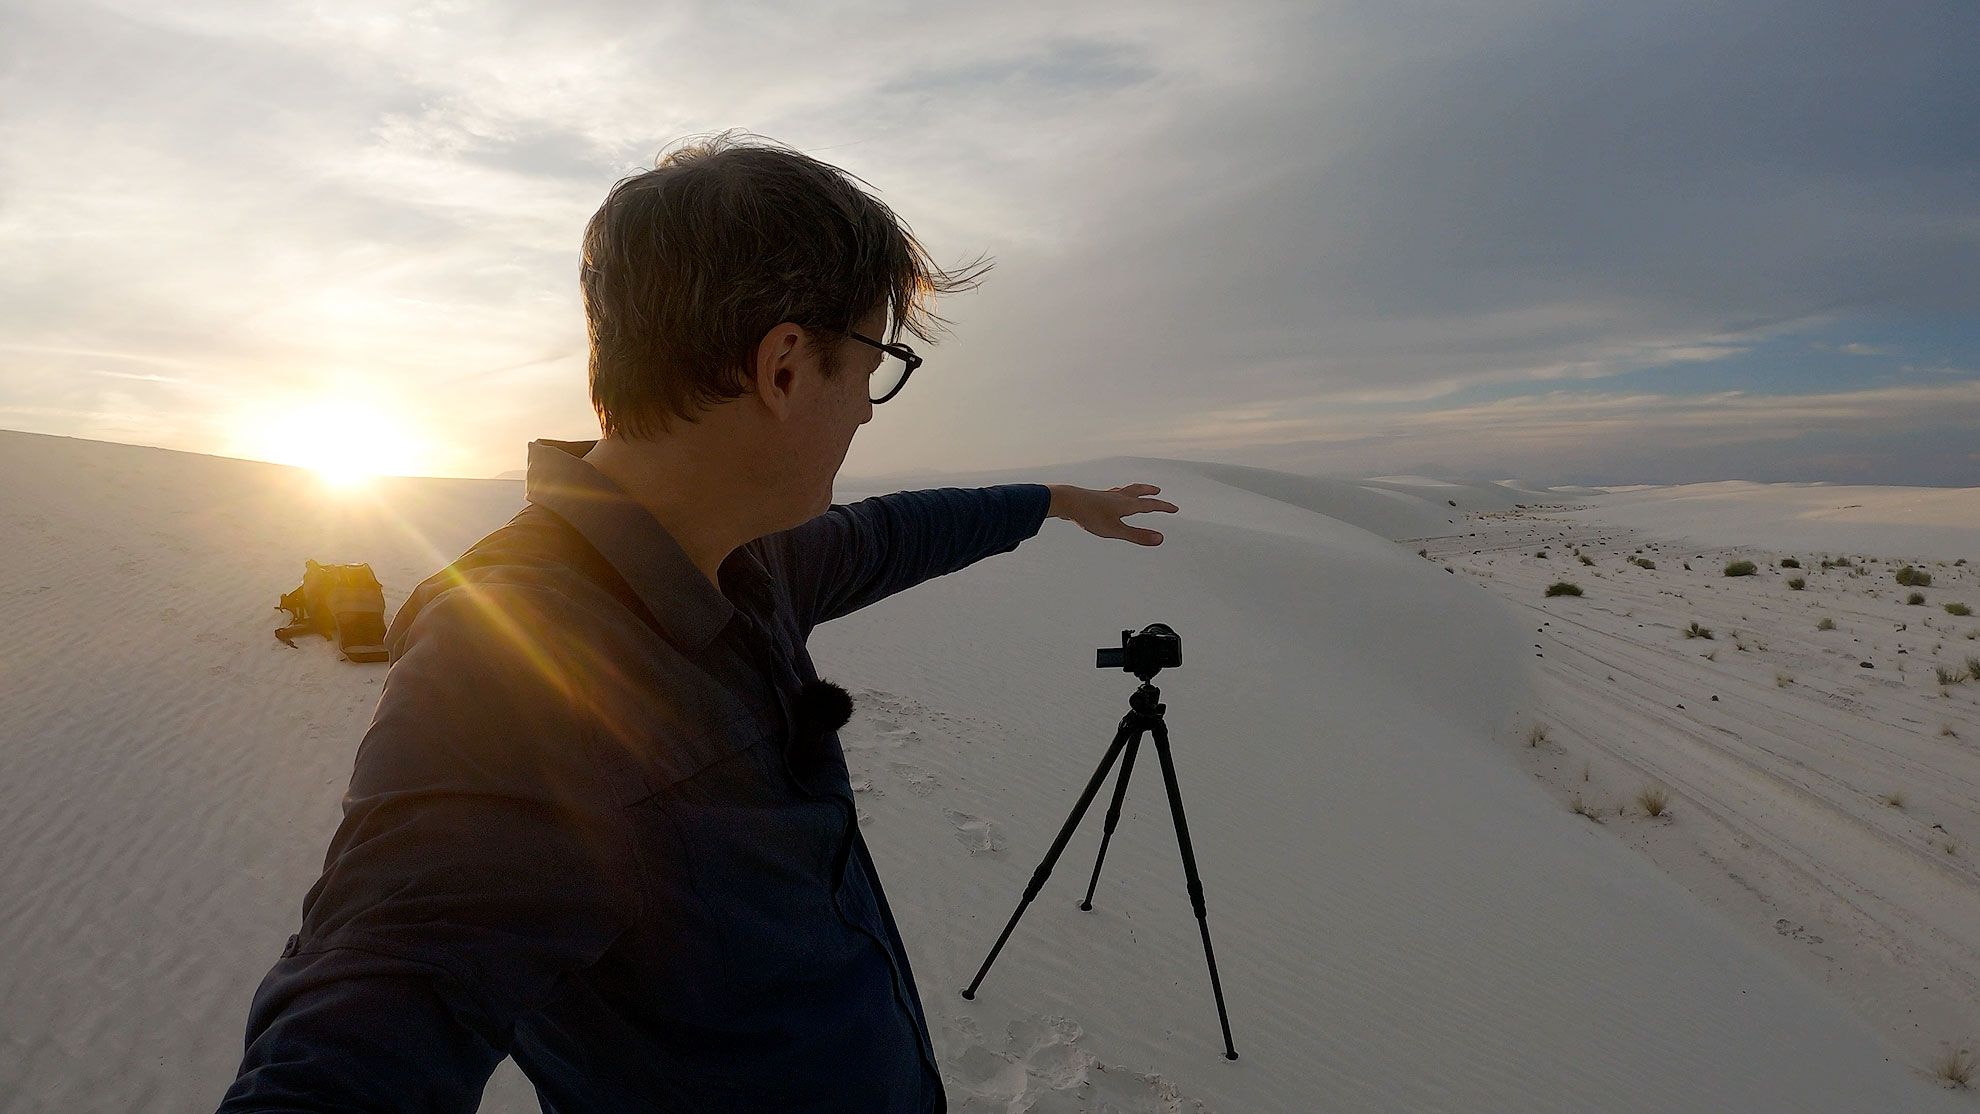
But best of all, the colors produced at this time are incredible. Atmospheric color bounces off the white gypsum, resulting in a variety of hues from soft orange at golden hour to magnificent magentas and pinks to deep, rich blue at blue hour. The intensity of color may change from day to day, but I think the dunes are always at their most beautiful during this time.
When shooting at sunset, remember that the best color and light may be directly behind you! Keep a watchful eye on the environment at all times for best results. Also remember (as mentioned earlier) it takes time to hike through sand, so it's easy to miss the best light when moving around. I recommend finding a composition you're happy with soon before golden hour, then sticking with it for the best possible light.
Finally, once the sun drops behind the San Andreas mountains, you may be tempted to start packing your bag. I highly recommend waiting a little longer, for there can be final explosions of color just before the cool tones of blue hour set in. Again, pack a head lamp so you can stay in the dune field as long as possible.
How to photograph the dunes
Compositionally, dunes are all about geometry. Pay attention to their shapes and outlines, and how their edges ebb, flow and connect. Pay attention to how much visual space there is between the edges of the dunes and the mountains in the background. The best perspective could be with a tripod set to its tallest height, or down low on the ground to make the dunes appear taller. The goal is simply ensuring that no lines overlap, which removes depth from a two dimensional image.
Capturing the entire dune field, from a high vantage point, can be challenging. Even when standing on a tall dune, most dunes at White Sands are more or less the same height. This can cause their outlines to overlap and fold together (which removes depth from the image. In this situation, I recommend getting a little lower so the dunes appear taller and more majestic, especially with side-lighting from the west.
It's also important with sand dunes to shoot your way in. Meaning, when looking for a composition, start by shooting at a distance using a wide angle or telephoto lens. Resist the urge to hike right up to a dune to photograph it, for every step you take will create footprints in the pristine white sand. I only move forwards towards a subject when I'm absolutely sure I've exhausted all other compositional options beforehand.
Finally, pay special attention to contrast. The dunes can become amorphous and indistinct when the light gets soft. This is especially true when facing east with the setting sun behind your back, low on the western horizon. I had the best luck shooting images facing north and south to catch angles of light and emphasize shape and contrast.
Final thoughts
However much time you spend at White Sands National Park, it truly is one of the natural wonders of the world. Great place for families and casual tourists, but also for photographers looking for clean, minimal subjects. I could spend days shooting at White Sands and never get bored with it!
Video
Check out my video on photographing White Sands National Park below.