How to fix colors and textures naturally in Photoshop
Adobe has added numerous patch and clone tools to Lightroom, Camera Raw and Photoshop over the past few years, with the Remove Brush tool being the latest and greatest. I'm a fan of Remove, Content Aware Fill and other tools, but have found they can sometimes produce unnatural results. I'm also not the biggest fan of inserting "fake" pixels into my landscape images, which I always try to keep as natural as possible.
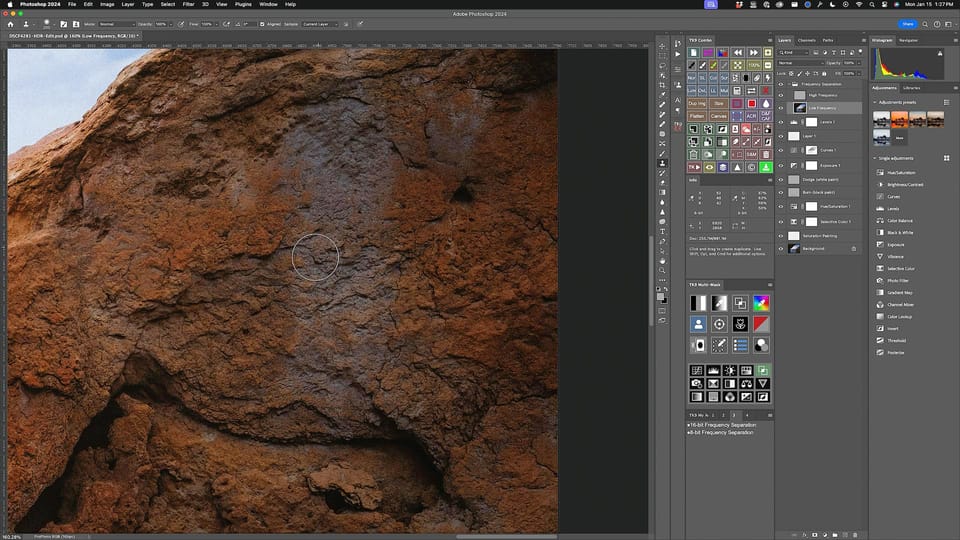
Fortunately, there's an old school technique that's been around almost as long as Photoshop itself that can produce better, more realistic results with minimal effort: frequency separation.
I love this technique, for it allows me to fix the underlying color of a problematic area without changing its texture. On the flip side, I can also copy the textures from one area to another using "real" pixels, not imaginary ones.
To learn more about frequency separation, check out my new video below:
How to fix color and texture video
Also, click the button below to download (for free) the frequency separation actions used in this video. Simply unzip the file, copy the ATN file to a local drive (I like using Dropbox for cross-device use), then import to Photoshop's Actions panel using "Load Action" from the panel's options menu. Run either the 8 or 16-bit action (more info in video), then you're good to go.
Enjoy!